
Creating and Managing Custom Checklists
Ancora's custom lists allow you to organize non-scheduled items, grocery tallies, packing checklists, and ongoing reference notes outside your timeblocked calendar.
Accessing the My Lists Screen
To access your checklists, open the side navigation drawer by tapping the menu icon (☰) in the top-left corner of the Day View header, then select Lists (marked by the purple checklist icon).
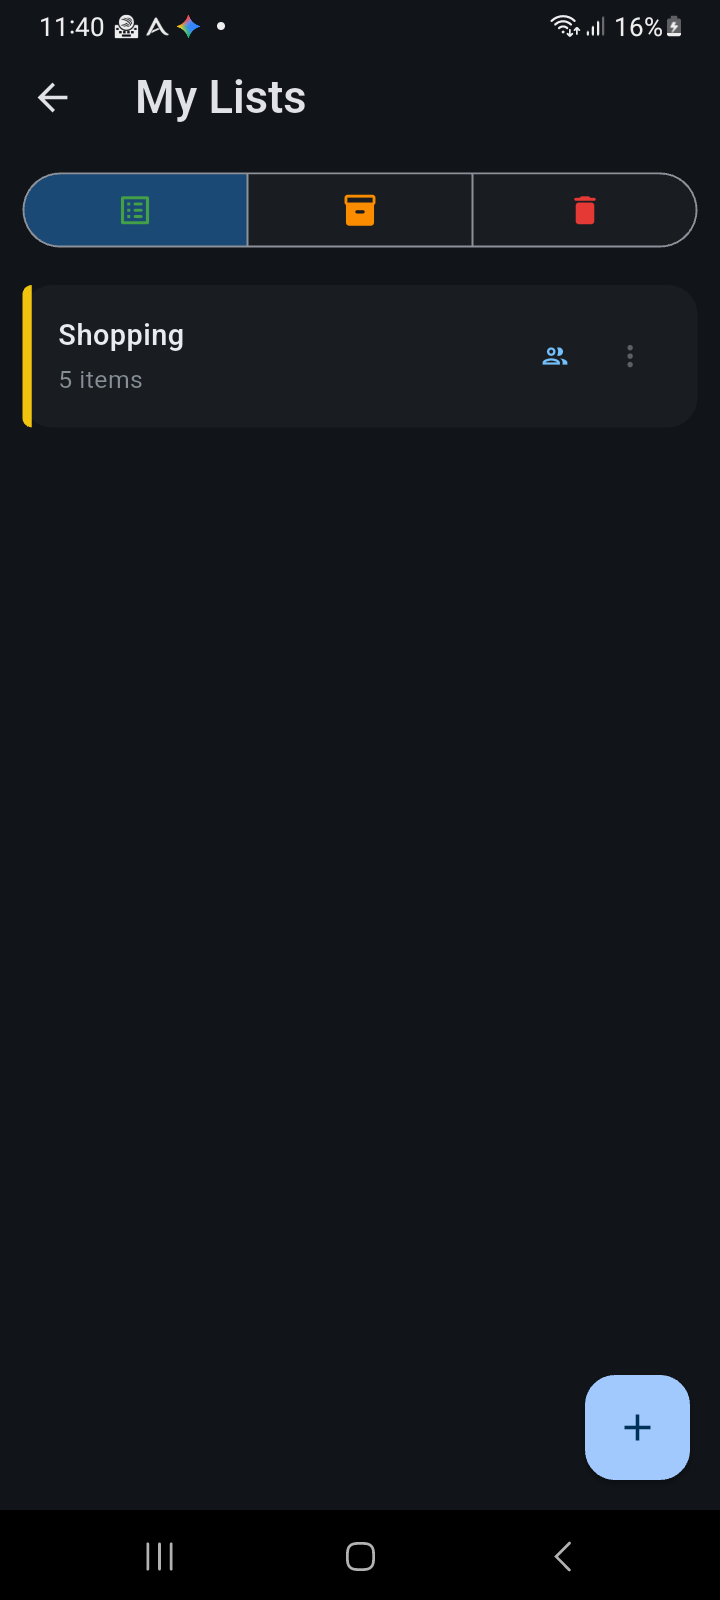
Figure 7.1: The My Lists overview screen displaying active list cards, item counts, color accent stripes, and the three top view tabs.
The Three List Status Views
The My Lists screen provides three segmented tabs at the top:
- Active (List Icon): Displays all active checklists currently in use. Each list card presents the list title, total item count, category color accent stripe, and collaboration or reminder badges.
- Archived (Storage Box Icon): Houses completed or seasonal checklists that you want to preserve without cluttering your daily view (such as holiday packing lists or project templates). Archived lists can be unarchived at any time.
- Deleted (Trash Can Icon): Holds soft-deleted lists. Deleted lists remain recoverable in this tab for 24 hours before being permanently removed from your device.
Creating a New Checklist
To create a new checklist, tap the blue floating action button (+) in the bottom-right corner of the My Lists screen. The creation sheet provides the following settings:
- List Name: Enter a clear, descriptive title (e.g., Shopping, Camping Gear, Weekly Chores).
- Category: Assign an activity category to automatically color-code the list card's left accent stripe.
- Reminders & Timing: Attach an optional reminder profile or specific reminder date and time if the checklist needs an alert.
- Share List: Enables collaborative household sharing with family members (detailed in Article 7.2).
- Custom Voice Reminder: Enables natural spoken voice prompts when checklist reminders trigger.
Managing Checklist Items
Tap any list card to open its full item view. Managing items is designed for quick, tactile interaction:
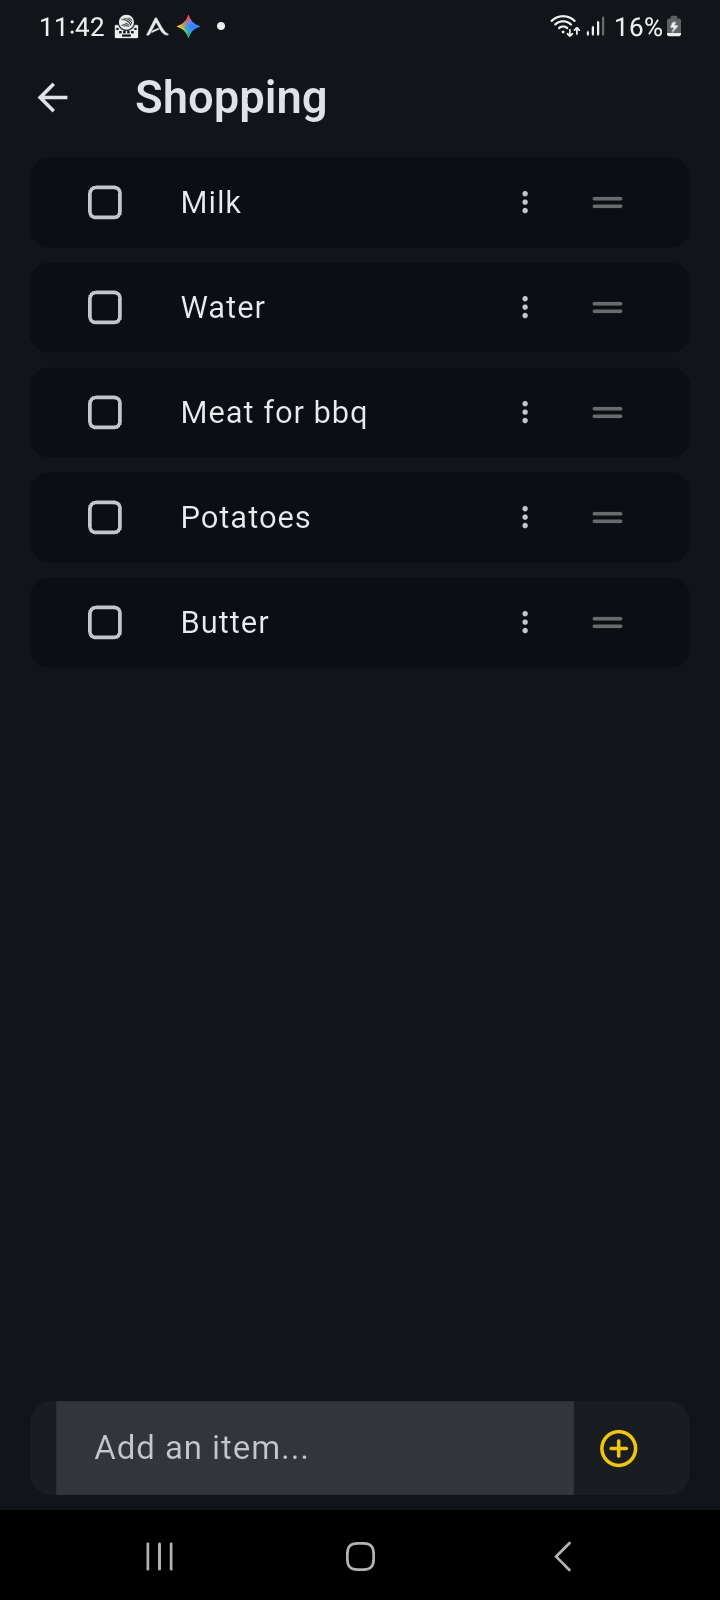
Figure 7.2: Checklist details view showing item checkboxes, drag-and-drop reorder handles, and the bottom fast-entry input bar.
- Fast Entry: Type an item into the bottom input field (Add an item...) and tap the gold + button to append it to the checklist.
- Checking Off Items: Tap the circular checkbox next to any item to mark it complete. Completed items receive strikethrough text, dim slightly, and move below uncompleted items.
- Drag-and-Drop Reordering: Press and hold the grab handle (☰) on the right side of any row to reorder items to match your preferred workflow (such as arranging supermarket items by aisle).
- Swipe to Delete: Swipe any item row from right to left to trigger a red delete sweep and remove the item from the list.